Bước 1: Tạo Application Passwords
Đối với WordPress phiên bản < 5.6 thì bạn cần phải cài đặt plugin Application Passwords, còn phiên bản >= 5.6 thì bạn không cần phải cài đặt plugin
Bạn đăng nhập vào website, vào chỉnh sửa profile user, tại phần mật khẩu ứng dụng
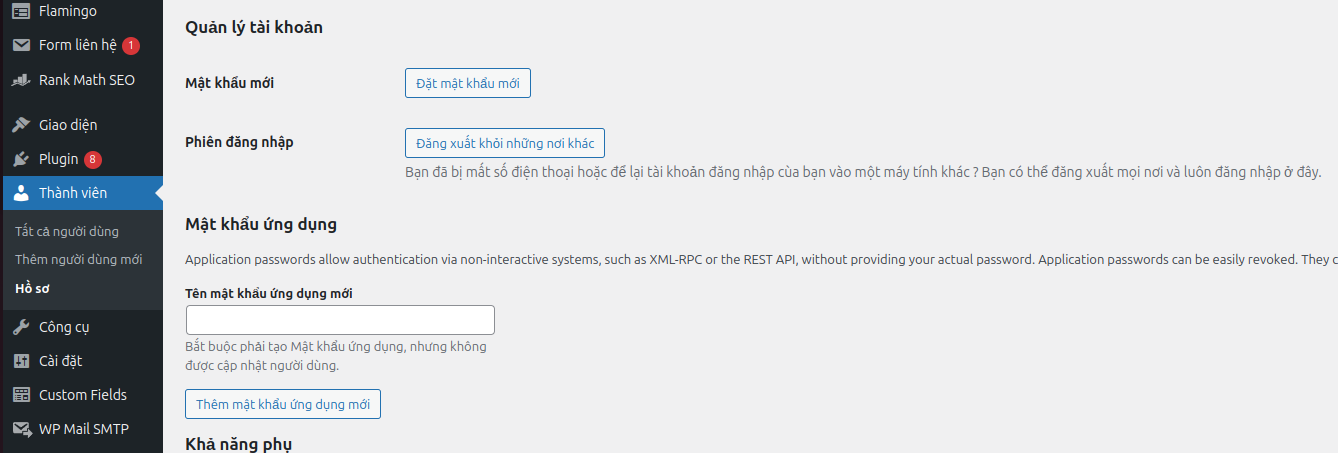
Bạn đặt tên mật khẩu ứng dụng và nhấn thêm mật khẩu ứng dụng mới
Vd: mình đặt tên là: sync product

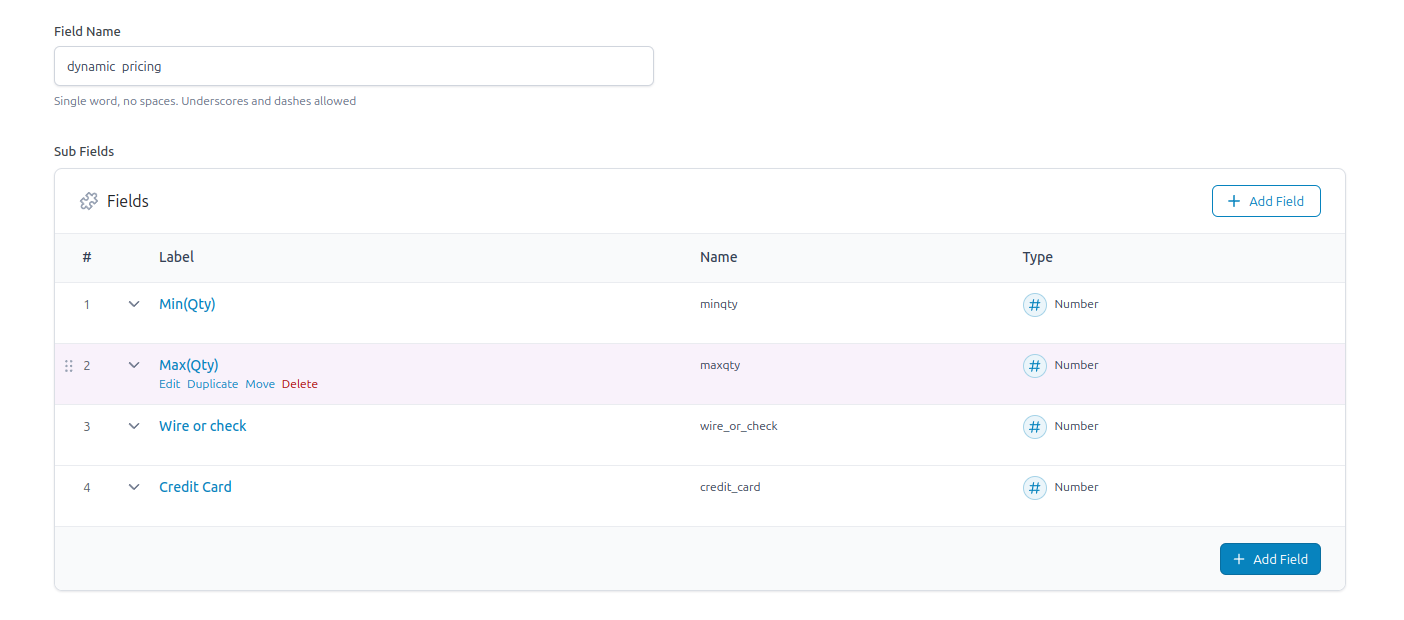
Bước 2: Trong ACF Pro (>= 5.11 ) bạn tạo field
Lưu ý: Kể từ phiên bản 5.11, ACF đã tích hợp hỗ trợ xem và quản lý các trường tùy chỉnh thông qua WordPress REST API. Điều này cho phép các nhà phát triển truy cập và chỉnh sửa dữ liệu trường tùy chỉnh của họ bằng các endpoint mặc định của WP REST API hoặc xây dựng các theme tùy chỉnh bằng React, Vue, hoặc bất kỳ thư viện JavaScript nào khác.
vd mình tạo field: dynamic_pricing
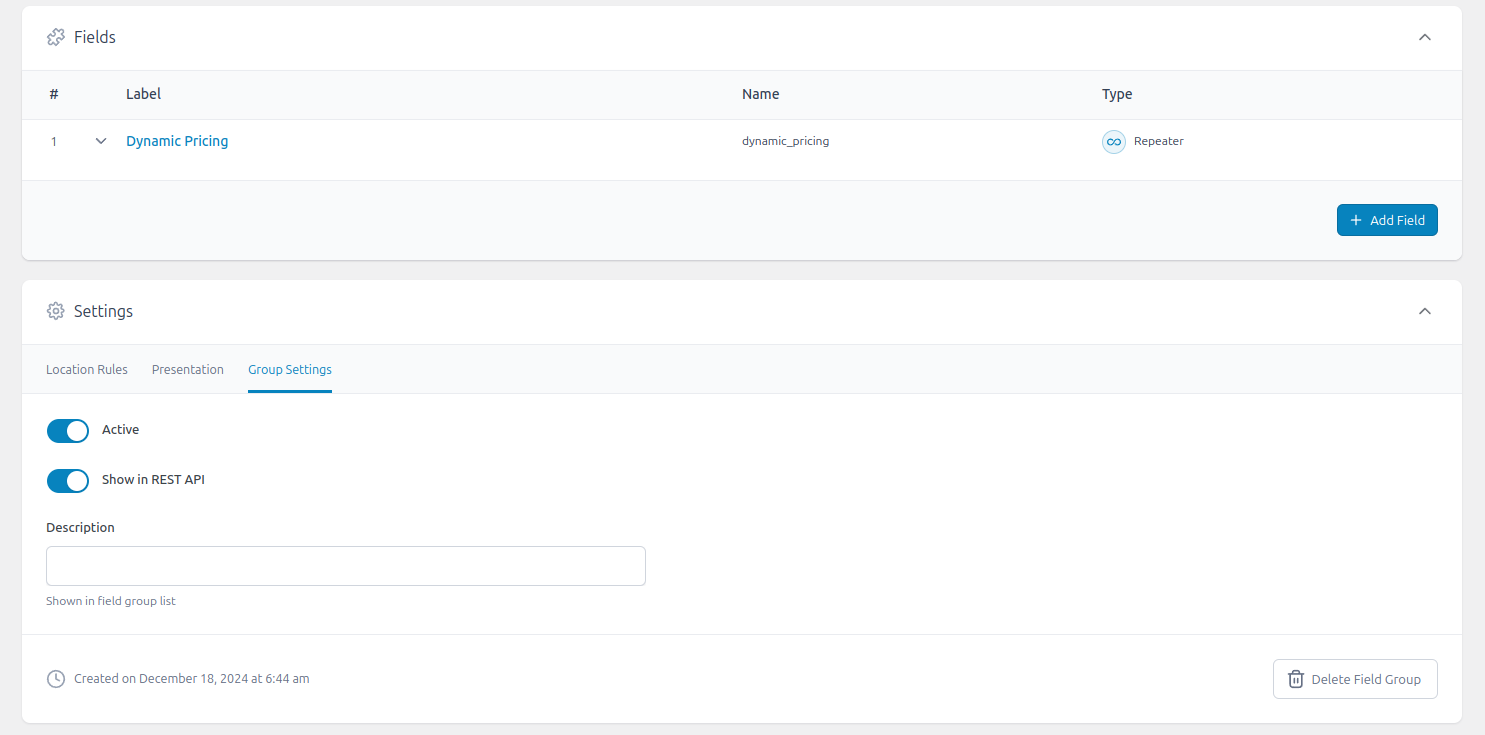
Bạn nhớ bật phần Show in REST API ở tab: Group settings nha
Bước 3: Add or Update Post Meta sử dụng REST API
Tạo một bài viết mới
Bạn có thể tham khảo bài sau https://developer.wordpress.org/rest-api/reference/posts/ để bổ sụng field cần tạo post mới:
$login = 'tan_mao';
$password = '1HEu PFKe dnqM lr4j xKJX My63';

// create a post with WordPress REST API
wp_remote_post(
    'https://WEBSITE-DOMAIN/wp-json/wp/v2/product',
    array(
      'headers' => array(
        'Authorization' => 'Basic ' . base64_encode( "$login:$password" )
      ),
      'body' => array(
        'title'   => 'Tên sản phẩn - Post title',
        'status'  => 'draft',
      )
    )
);
Update post meta
vd: mình update field repeater
$login = 'tan_mao';
$password = '1HEu PFKe dnqM lr4j xKJX My63';
$product_id = 124;

wp_remote_post(
    'https://WEBSITE-DOMAIN/wp-json/wp/v2/product/$product_id',
    array(
        'headers' => array(
            'Authorization' => 'Basic ' . base64_encode( "$login:$password" )
        ),
        'body' => array(
            "acf" => array(
                "dynamic_pricing" => array(
                    array(
                        "minqty" => 1,
                        "maxqty" => 9,
                        "wire_or_check" => 2751.63,
                        "credit_card" => 2875
                    ),
                    array(
                        "minqty" => 10,
                        "maxqty" => null,
                        "wire_or_check" => 2749.63,
                        "credit_card" => 2873.23
                    )
                )
            )
        ),
    )
);
Xử phản hồi từ server
$request = wp_remote_post( ... );

if( 'Created' === wp_remote_retrieve_response_message( $request ) ) {
  $body = json_decode( wp_remote_retrieve_body( $request ) );
  printf( 'The post %s has been created successfully', $body->title->rendered );
}